This is an intermediate class – you must have previous experience with wire weaving or wrapping.
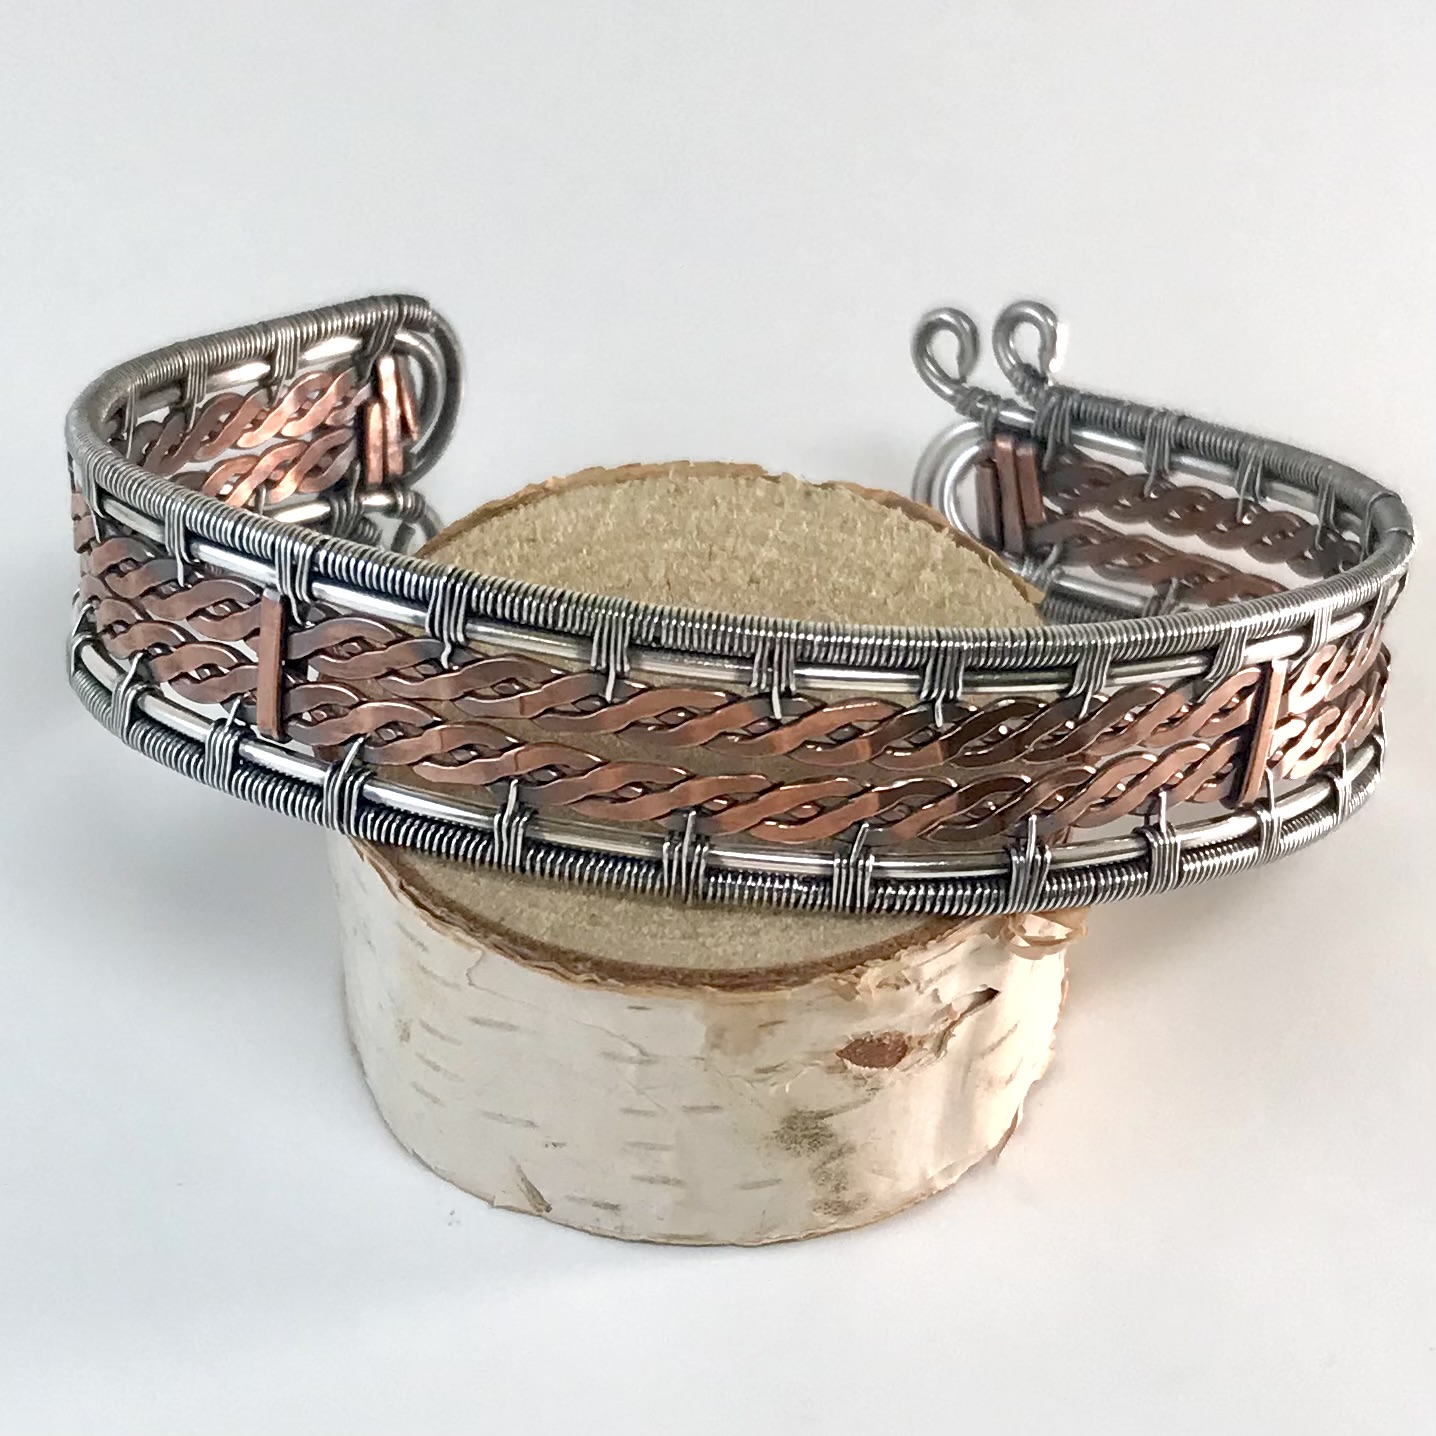
In this class you will make a copper and sterling silver cuff, using decorative wire you make yourself, using a drill and rolling mill. Yes, power tools aren’t just for carpentry! No need to be afraid! When complete, you will have a stunning cuff with a lacy center that looks harder than it really is.
Note: All materials and tools for classes must be purchased at Beadoholique Bead Shop. This allows us to continue providing you with quality classes.
Materials Needed: 40 inches of 16g round, soft copper wire 32 inches of 16g round, soft sterling wire 20 feet of 28g weaving wire
Tools Needed: Heavy duty flush cutters Flat nose pliers Awl or T-pin Steel bench block Nylon or rawhide hammer Files Sandpaper assortment Safety Glasses Nylon jaw pliers Chain nose pliers Round nose pliers Brass or other utility-type hammer Sharpie Magnifiers/readers are highly recommended for a successful class experience (even if you wear contacts or glasses)! Provided: Cordless drill, rolling mill Optional: Liver of sulfur to patina, pro polish pads
Techniques Used: Wire weaving, wire wrapping
Skill Level: Intermediate
Prerequisite: Must have previous experience with wire weaving or wrapping
Instructor: Cindy
Three ways to sign up: Click here Send me an email Give me a call at 832-674-9005
Please Read:
1. Classes will begin on time! All students must arrive early for class. Even if you have already purchased supplies for the class, it takes time for everyone to set up and settle in. Students arriving late will need to re-schedule. Please be respectful of others by arriving early for class.
2. All beads, materials, and tools are available for purchase at the bead shop. We appreciate you purchasing materials and tools at the bead shop so that we may continue offering you the best classes around.
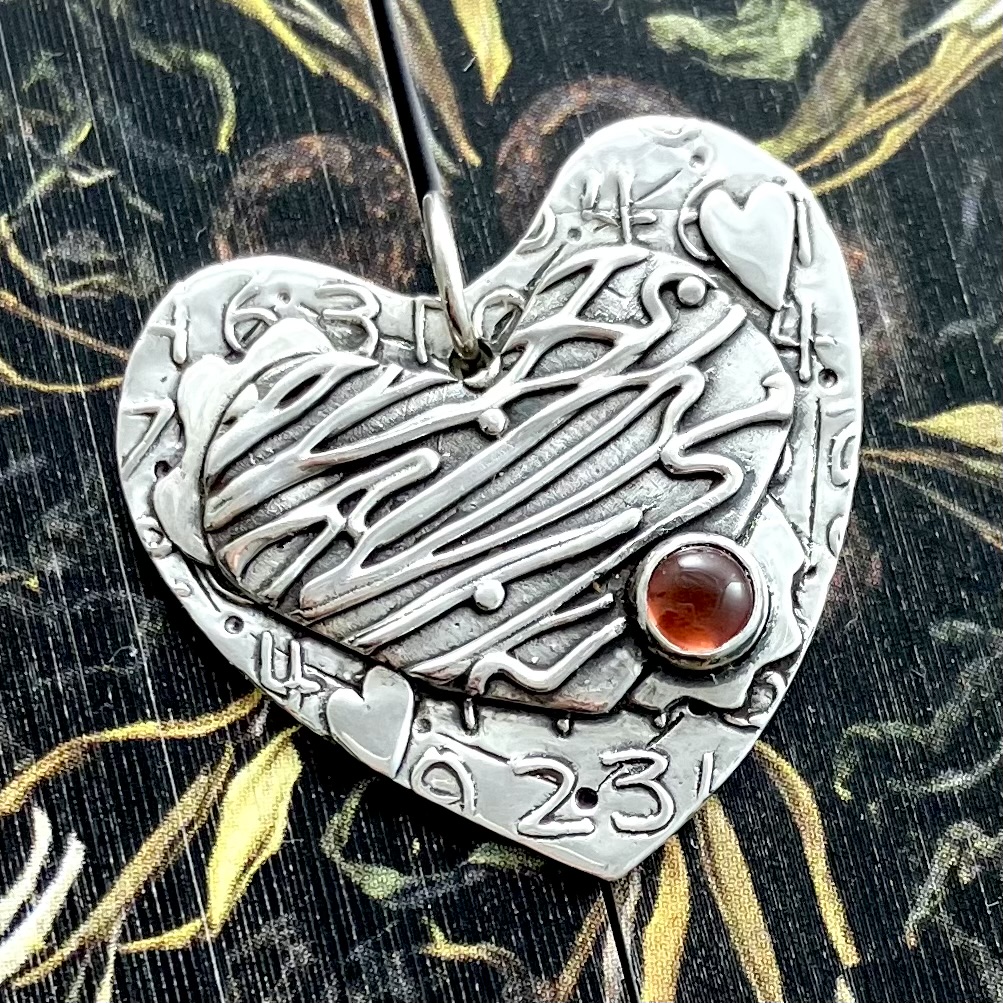
Beginners will make a sterling silver clay pendant, similar to the image above, featuring 2 heart shapes, 2 textures, 1-2 molded decorations, and a fired-in cup bezel for setting a cabochon. *Another shape can be subbed such as a circle, teardrop, oval, square, etc.
The image above shows an example for advanced students. Advanced clay artists will create a similar pendant with 2 contrasting slabs, one with a low to high relief, the other smooth and polished to a high shine. Slab shapes can be from templates or made by hand. Your personal choice of cabochon will be set with an attached fine silver bezel that will be filled with investment before firing.
Typically, pieces from Saturday classes are fired the following Tuesday. An informal day for finish work can be arranged; it is not required because class instructions will have the information you will need to finish your pendant at home.
Please Read: The class fee shown above does not include the metal clay or any other supplies. You will be charged for the metal clay the day of the class. All materials and tools for classes must be purchased at Beadoholique Bead Shop. This allows us to continue providing you with quality classes.
Materials and Supply list: Those who have completed prerequisite classes are expected to bring whatever extra materials, supplies and tools they need to complete the piece to the pre-fire stage. Please ask any questions via text ahead of class. Thank you.
* = optional for you to bring ** = provided by instructor or the bead shop
Materials & Supply list for beginner and advanced levels: Advanced level has extra items listed at the bottom of the list. Art Clay 950, 25gm pack *Syringe clay: for ease in creating a zigzag line texture Fine silver cup bezel, 4mm diameter, plain or serrated 4mm cabochon to fit the bezel (check for fit!) A non-stick work surface (any smooth board, place mat, or clay working board) Teflon sheets A release agent such as Silk, Cool Slip, ClayMate Distilled water in a fine mister bottle AND in a small bowl A small (not mini) and medium sized brush or water brush Clay hydrator Clay thickness frames (recommended) or slats used in rolling slabs Small acrylic roller Sharp pick (or bead reamer) for cutting 4mm and 5mm circle punch or plastic circle template with small circles *Thin spatula Xacto knife Tweezers for handling bezel cups and stones 6″ metal or plastic ruler Heart and/or other shape templates** Tissue blade 1-2 texturing plates and/or upholstery fabrics,** that will create appropriately sized textures for this size pendant (about 1″ to 1.5″). Note: 1 slab can be plain and polished to a good shine Clay forming/shaping tools: Clay shapers, toothpicks, small files Silicone molds for molding 1-2 extra embellishments** Cup warmer and a soldering screen to place over the top (to slow/prevent overheating/warping) Finishing tools for dry clay: cosmetic nail boards for sanding (in medium to fine grits), 3M foam sanding pad, a soft dry brush to dust pieces while sanding Pin vise with a 1mm and a 2mm wide drill bits for making a bail hole
Beginner Post-firing tools: Soft brass brush ** Small hand files (6″) Burnisher (curved is a good starter type) Bezel setter tool Polishing papers**
ADVANCED level notes, extra tools & materials: *optional / provided** In the green state, the class model for advanced measures approx 1″x2″.
Paper, pencil, and scissors to make a pattern if you do not use templates Torch and fuel Soldering station, block, and soldering tweezers Circle punches, various sizes, to open up the back for shrinkage during firing Fine sandpapers: 600, 800, 1000, and 1200 grits Cabochon should be a minimum of 10mm at the widest or in height and in good proportion for your design. Any shape. Fine silver bezel wire to fit your stone Miter vise and hand files Small mandrel* Investment**
Techniques Used: Metal clay
Skill Level: Beginner
Prerequisite: None
Instructor: Shauna
Three ways to sign up: Click here Send me an email Give me a call at 832-674-9005
Please Read:
1. Classes will begin on time! All students must arrive early for class. Even if you have already purchased supplies for the class, it takes time for everyone to set up and settle in. Students arriving late will need to re-schedule. Please be respectful of others by arriving early for class.
2. All beads, materials, and tools are available for purchase at the bead shop. We appreciate you purchasing materials and tools at the bead shop so that we may continue offering you the best classes around.
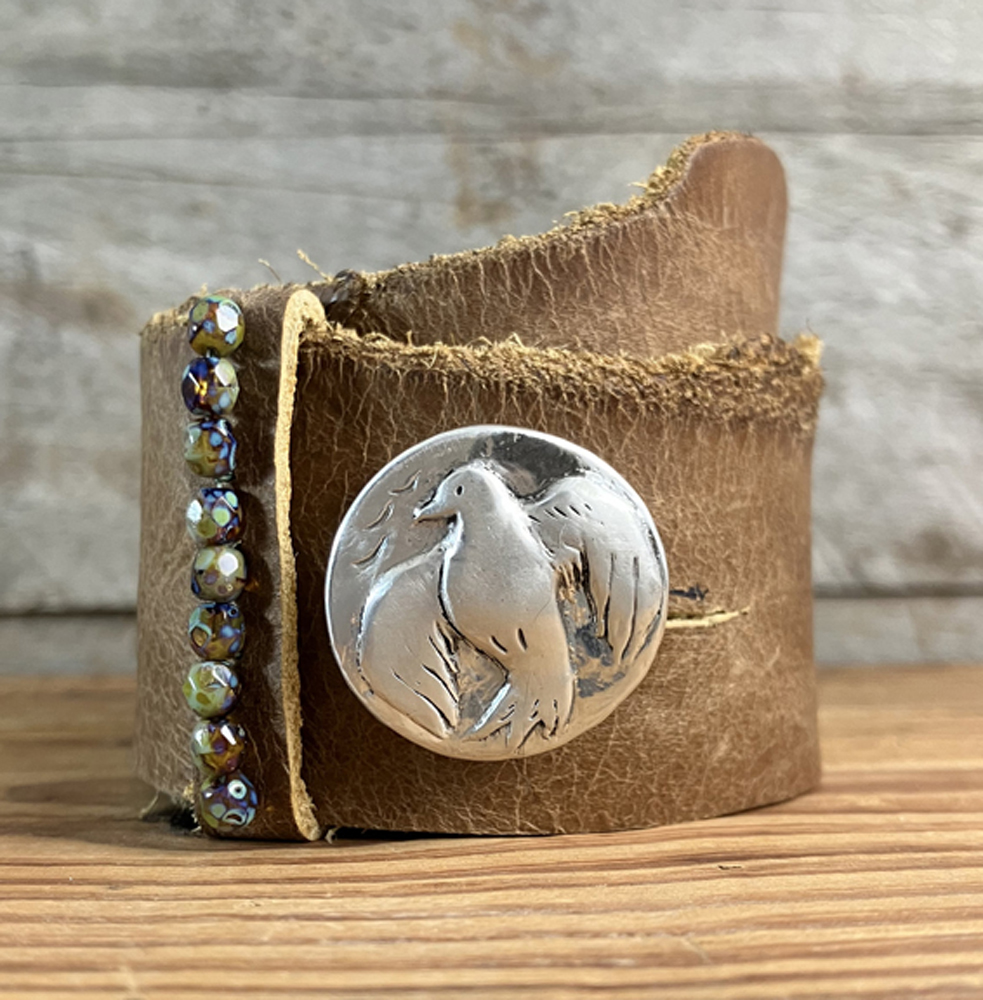
Silver with leather makes a classic combination, expressing our love for the earthy and the inner cowboy! In this class, make a leather wrap bracelet featuring your handcrafted silver clay button. Inner cowboy or not, express your own impulses in this piece with imagery created from the fabric of your life (inner and/or outer…), using your molds, textures, and your own fingers!
Intermediate to Advanced Level: The silver loop with stones is an optional project for this class, intended for those with soldering skills. The loop can be made using one or more bezel cups. Other options are listed in the description.
The button shown is large at 1″ diameter, bracelet strap width is 1.5″ — 2.0″. The long leather strap overlaps and has a leather beaded loop to hold the bracelet closed. Optional additions include extra beaded loops (like the one here or strung on round leather cord), or for those skilled in silversmithing, a sterling silver loop, plain or embellished with a stone setting.**
Use molded clay pieces or Ready molds to create decorative embellishments or cut out or model your own shapes. Consider using syringe clay. Texture the background, if desired.
**Intermediate to advanced level in silversmithing. A plain silver band-loop can look great as an understated complement matching button textures or displaying a small clay embellishment. Consider soldering on a bezel cup as a simply way to add a stone(s).
Please Read: The class fee shown above does not include the metal clay. You will be charged for the metal clay the day of the class. All materials and tools for classes must be purchased at Beadoholique Bead Shop. This allows us to continue providing you with quality classes.
Metal Clay Tools and Supplies: –Art Clay 950 –Syringe clay (optional) –Molds and/or molded elements, release agent –Texturing tools and materials (plates, fabrics, drawing picks, stamps, modeling tools) –Circle template with at least 1/2″ to 1-1/4″ circles –Bead reamer or sharp pick –Drill bits actual thickness from thinner up to 2mm –All modeling tools including work surfaces, brush and water, warmer with screen, etc. –All cleanup tools for silver clay: blades, scrapers, sanding tools
Leather Supplies: –Leather strip: 1.5″-2.00″ x 17″ (measure wrist for how much overlap is preferred) (available for purchase day of class). This length is approximately what is needed for the entire strap plus the loop closure, with extra left over for 1-2 more optional loops. –12″ (1.5mm) round leather cord in a preferred color, for attaching the button. –6″ extra of the same cord above per one beaded loop (thinner cord is okay but note that beads align better if cord gauge is closer to bead hole size). –Beadwork: Beads in photo are size 4mm. –Bead stringing cord to stitch beads to the leather. –Needle
Leather Working Tools: –Smooth flat cardboard, mat board, or a self-repairing mat to protect table top –Hole punch (small punch, 2mm or to match small gauge leather cord) –Long metal ruler (if you have one, at least 12″ long), preferably with cork bottom. One will be available for use. –New, sharp Xacto blade in knife. –Sharp scissors for trimming leather and cord –Pencil –Plain sheet of typing or note paper to make a pattern, if needed. –Leather glue, if needed, will be provided by instructor.
**Optional Silver Band: Some ideas and measurements, and tools needed, for intermediate to advanced silversmiths. For a plain band: –2-2.5″ (10-gauge) sterling square wire to roll in mill for band. Milled to a 1mm thickness, this piece increases to 6.5″, leaving some to spare. A thicker band can be made using a larger gauge wire or cutting a strip from silver sheet. –Pliers, mini mandrel, etc., for bending into a fitted band. –Soldering materials and tools not provided by the shop: solder, soldering tools, torch, fuel. –Polishing tools and supplies For an attached bezel to the band: –Bezel cup, or materials for making a bezel (bezel wire, silver sheet, solder) –Bezel-making tools: miter jig and files, rawhide mallet, piece of steel wool for cleaning 3 & 4 listed above.
Techniques Used: Silver clay, syringe (optional)
Skill Level: Intermediate to Advanced
Prerequisite: Previous silver clay classes, use of syringe (optional), soldering (for advanced techniques)
Instructor: Shauna
Three ways to sign up: Click here Send me an email Give me a call at 832-674-9005
Please Read:
1. Classes will begin on time! All students must arrive early for class. Even if you have already purchased supplies for the class, it takes time for everyone to set up and settle in. Students arriving late will need to re-schedule. Please be respectful of others by arriving early for class.
2. All beads, materials, and tools are available for purchase at the bead shop. We appreciate you purchasing materials and tools at the bead shop so that we may continue offering you the best classes around.
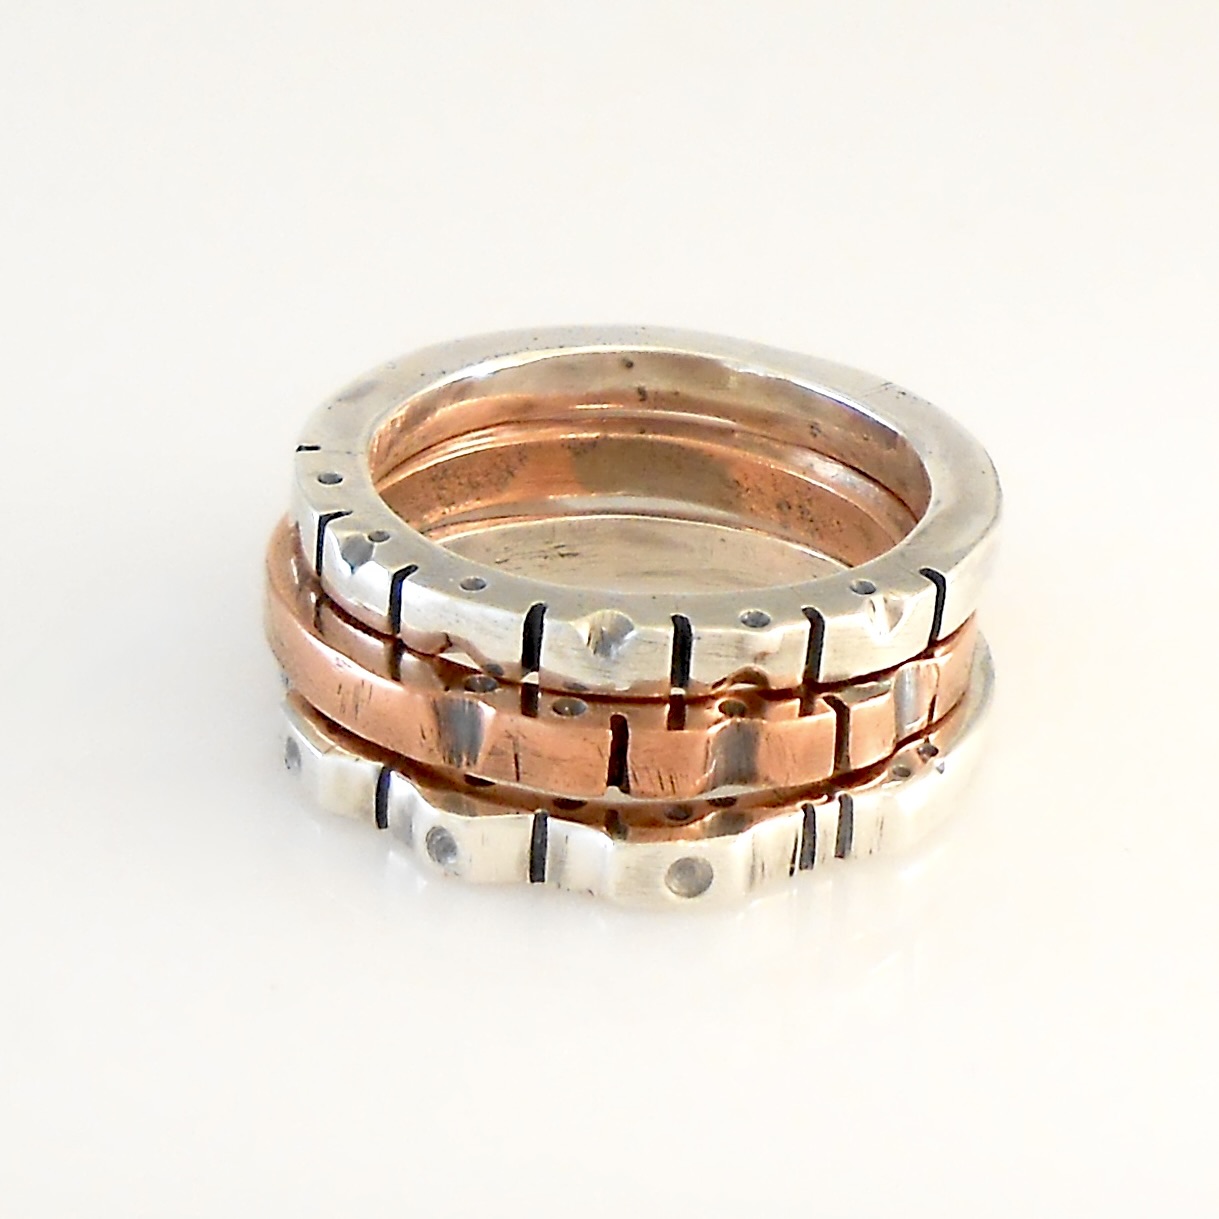
For the artist of any craft, there isn’t a lot more satisfying than making something wonderful with just a little bit of materials and a few of the simpler skills needed. In this class, use those basic skills to make handsome rings that offer appealing versatility….stacking rings are just fun! Of course this class is about skills, but as artists it is also about the aesthetics of unity and harmony. Let’s get to it!
Class is beginner level up to advanced. Advanced skill is adding a decoration to one ring: flattening an area to add a small bezel cup for a choice of flat cabochon, silver hemisphere or other suitable material.
Note: All materials and tools for classes must be purchased at Beadoholique Bead Shop. This allows us to continue providing you with quality classes.
Tools Needed: Triangle needle file (bring the set) Scribe Metal MM ruler Red Stone abrasives (optional) Separating Disc w/mandrel (optional) Blue polishing flat wheel (for flex shaft) Gray pumice flat wheel (for flex shaft) Radial discs (for flex shaft) Soldering station Bench block and sand anvil Nylon/Rawhide hammer Nylon flat nose pliers Pillar file (flat metal file) Pro polish pads Ring clamp Mask (required) / Apron Stamping hammer (optional) Steel ring mandrel Jeweler’s saw, blades, lube, bench pin Circle template for making even marks on ring (Beadoholique metal chart) Texture or Rivet hammer (optional) Sharpie, Pencil Copper match solder Silver hard solder Ring bending pliers Miter vise Liver of sulfur (provided) Center punch (not auto) Hallmark stamps (optional) Tube cutting pliers or jig Flex shaft (provided) Magnifiers/readers are highly recommended for a successful class experience (even if you wear contacts or glasses)!
Techniques Used: Soldering, metalworking, hand carving, ring sizing
Skill Level: Beginner to Advanced
Prerequisite: None
Instructor: Shauna
Three ways to sign up: Click here Send me an email Give me a call at 832-674-9005
Please Read:
1. Classes will begin on time! All students must arrive early for class. Even if you have already purchased supplies for the class, it takes time for everyone to set up and settle in. Students arriving late will need to re-schedule. Please be respectful of others by arriving early for class.
2. All beads, materials, and tools are available for purchase at the bead shop. We appreciate you purchasing materials and tools at the bead shop so that we may continue offering you the best classes around.